How to Develop a Chatbot with Node.js? Why you should Hire Node.js developer?
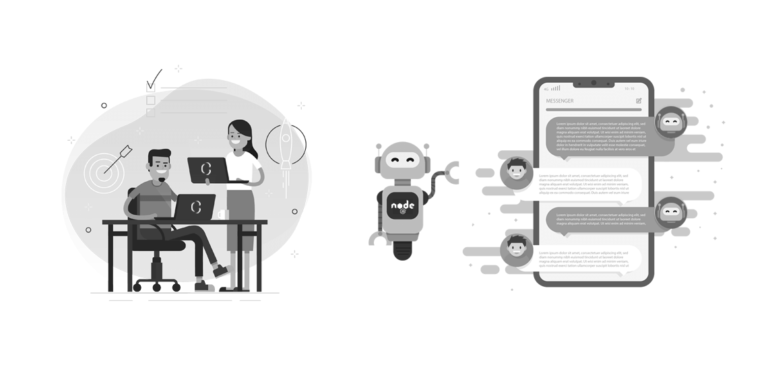
When we say let’s develop a chatbot with Node.js, the first question is, why Node.js? Node.js happens to be the perfect programming language for your bot development needs. first, the learning curve is small for this programming language. Second, the framework supports real time messages. Finally, you can use the frameworks such as Express.js to create an API for the chatbots from the scratch.
• In most of the chatbots, the developers instill some kind of Artificial Intelligence, which helps the chatbots connect with the humans, and answer their queries
• The second ingredient that is most important for chatbots is the NLP.
However, you don’t need to be an expert with any of these. If you don’t add AI flavors to the chatbot, your bot will still function nicely and help you in ways you are looking at it. To add NLP, you can easily use the NLP library and add essential buttons and UI to the chatbot.
Let’s step into the actual creation of the chatbot for any messenger or other service.
Chatbot development with Node.js for messenger services
The chatbots that have been developed for Facebook, Slack and Telegram, have made the very word bot very popular among the developers and companies.
Create the project folder
The first step to creating a chatbot with Node.js development services for any of the messenger is to create the project folder in Node.js. You should also create the index.js file along with the project folder. Once the folder is created, go to the folder from terminal and create the package.json with the help of init, and install the various modules required to it. The modules will depend on the service for which you are creating the chatbot and the file needed to get the OG data for the messenger. In general firebase is used to collect the OG data for the messenger or the application for which you are creating the chatbot.
The firebase is also being used to store the data that you will be collecting; hence, you need the firebase module as well.
Creating a new bot
The app market is flooded with tools that make it easy for you to develop the chatbots using Node.js. BotFather is the telegram API, which can be installed to the bot app you are creating for the messenger. Similarly, there are app APIs that you will need to use in order to get the data for the application. The creation of the new bot becomes easy as a result.
There are several other Bot builders too like Claudia, which help initiate the bot building process for the different applications. Claudia is specifically used for the different messenger apps such as Facebook messenger chatbot, Telegram etc.
How do these bot builders and API apps for the particular application help? They take care of the boilerplate code and the common tasks required from the bot infrastructure. In short, using these apps, you wont be wasting a single minute in creating the boilerplate code or the code for repetitive tasks and tasks common to all apps in a particular niche. You just need to concentrate on coding the chatbot app that you are planning to devise.
Now that you are aware of the first few steps that you need to take, let’s begin digging into the actual development process for the app.
Add the modules
Remember the folder we created at the beginning. Now, it is time to add the modules to these folders. The require() function needs to be used to add the modules to the Node.js project folder. You should add the functions to the index.js file.
Once done, you will need to use the token that you generated while creating the bot using the bot builders, to store all the information available regarding the bot. This will remain constant in the files.
At this point, you will need to replace the constant “your-token” with the actual token generated by the bot for the bot to connect and communicate. This new constant for the bot connects with the API for the particular app that you are creating the chatbot to create the new bot object.
Now that you are done with the basics, let’s get the chatbot to do what we really want it to do, i.e. communicate.
For this, you will need to instruct it to react in a particular way for the event you will be generating. For instance, every time someone comes to the page, the bot is supposed to say something to the user. The moment the person shows up on the web page or application, there is a need for a reaction from the bot. the person showing up is the event that triggers the reaction for the bot, which you will be coding.
The following code has been taken from Github. It is the code that will help trigger a reaction from the bot. It also shows how to add BotFather to the code and other details that we have talked of in this article.
const TelegramBot = require(‘node-telegram-bot-api’);
// replace the value below with the Telegram token you receive from @BotFather
const token = ‘YOUR_TELEGRAM_BOT_TOKEN’;// Create a bot that uses ‘polling’ to fetch new updates
const bot = new TelegramBot(token, {polling: true});// Matches “/echo [whatever]”
bot.onText(/\/echo (.+)/, (msg, match) => {
// ‘msg’ is the received Message from Telegram
// ‘match’ is the result of executing the regexp above on the text content
// of the messageconst chatId = msg.chat.id;
const resp = match[1]; // the captured “whatever”// send back the matched “whatever” to the chat
bot.sendMessage(chatId, resp);
});// Listen for any kind of message. There are different kinds of
// messages.
bot.on(‘message’, (msg) => {
const chatId = msg.chat.id;// send a message to the chat acknowledging receipt of their message
bot.sendMessage(chatId, ‘Received your message’);
});
Once you have written the code for the chatbot, worked on all the possible events that will trigger the chatbot to say something, and then developed the code part, then it is time to test your code.
For testing a code on Node.js, you simply need to go to the terminal and run this command:
» cd your-project-folder
» node index.js
once you run this command, the bot project will be run, and you will know exactly how it behaves and whether or not it is running perfectly.
After testing, you realize that the chatbot is working perfectly. Next, you want the chatbot to be able to function as a storage for your bookmarks. For this, you will need to connect the bot to the database. Firebase is ideal if you are want a cloud based database for your application. To add Firebase, you simply need to sign in to your Google account, visit the Firebase console, add project, name it and follow the steps mentioned. In minutes, your project is ready to go, and you will be taken to the dashboard on firebase for your project. There is database along the left side of the dashboard, click on it to create a RealTime database, and start it in the Test Mode. You can now add the Firebase to your web app. You can keep a check on the project using the project overview.
Test the database connected to the chatbot before you proceed. If you find everything is normal with the database, then you can step into deploying the chatbot.
If you want to develop a chatbot for your application or, have a node.js development idea, connect with Coruscate via email or phone. We will help you with not just setting up the chatbot, but also personalizing it for your specific needs.
Related Blog

On Demand Car Wash mobile app development tips : Incorporate these Features to your On-demand Car Wash App to Grow your Business
What started with Uber, has penetrated all industries known, including the food delivery apps and laundry services. It is gradually spreading into the lesser known industries as well, such as…
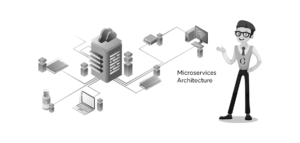
What is Microservices Architecture? Top Reasons Your Organization Should Switch to Microservices
Microservices Architecture has become a great deal of discussion among revolutionary application development organizations. If you are also looking forward to getting your own app build via this framework then…